【Shopify】Guide to Print Shipping Labels
1. Set Up Your Shipping Label printer
Before using Shopify e-commerce website platform , please make sure the shipping label printer has the driver installed and successfully printed a test page.

Please make sure your printer has the relevant functions when using the following two connection methods.
-Using USB connection: simply plug it into your computer.
-Using Wi-Fi connection: follow the Quick Start Guide's instructions to connect it to your Wi-Fi network and install the Wi-Fi driver.
Click the article below to know the detailed steps:

2. Test shipping labels
From your Shopify admin, go to Settings > Shipping and delivery
In the Shopify Shipping section, you can test your printer settings by clicking on Test shipping labels
After clicking on the Test shipping labels, the PDF file will be opened by default in your default browser. You can click the print button in the upper right corner to complete the printing.

It should be noted that you need to select the correct printer name and print size (4X6 inches)
3. Print Shipping Labels
Start Printing Labels: Once your printer is set up and tested, you can start printing shipping labels directly from your Shopify admin when fulfilling orders.
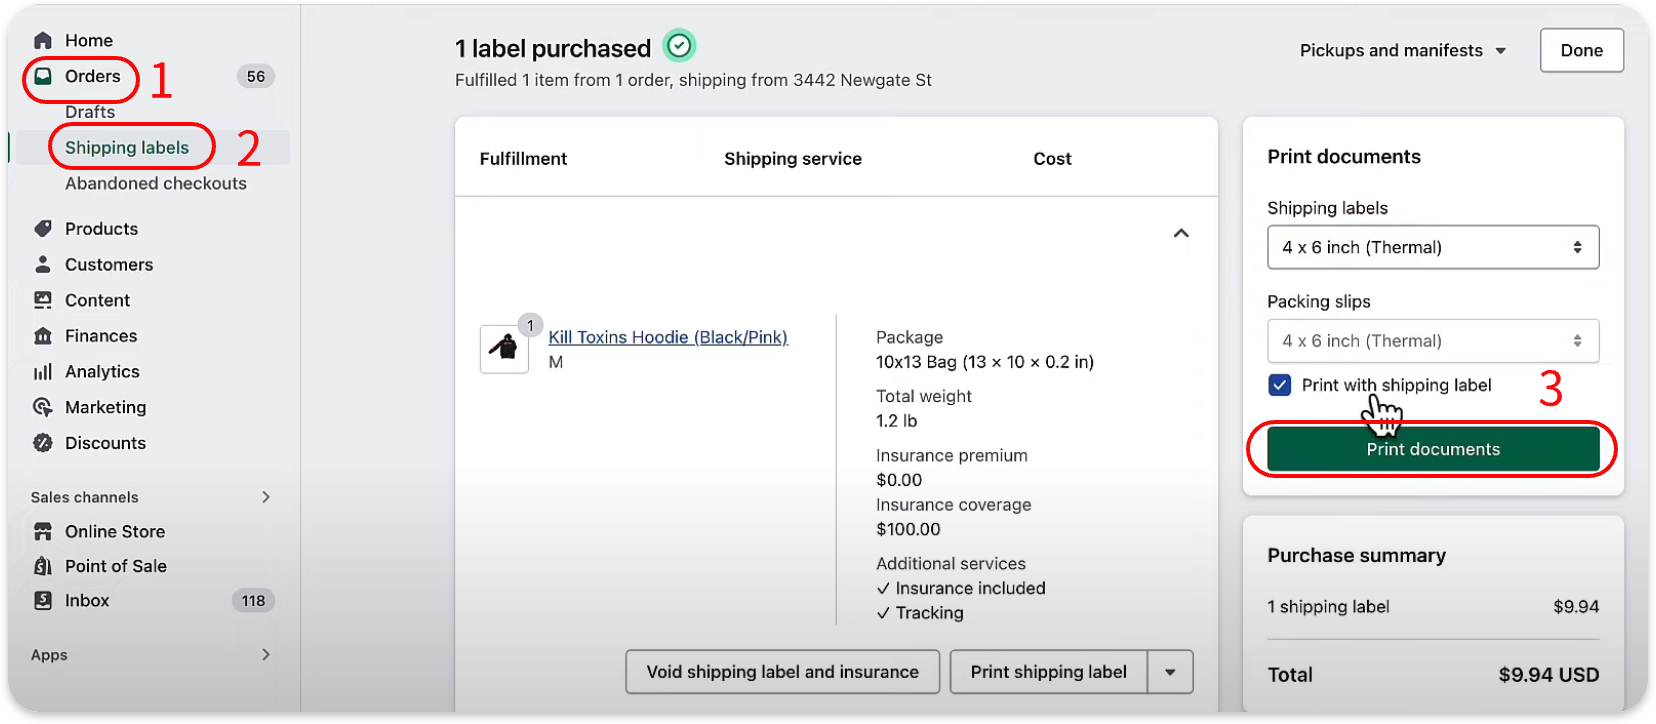
 Please remember to select the print size that matches your actual printing paper.
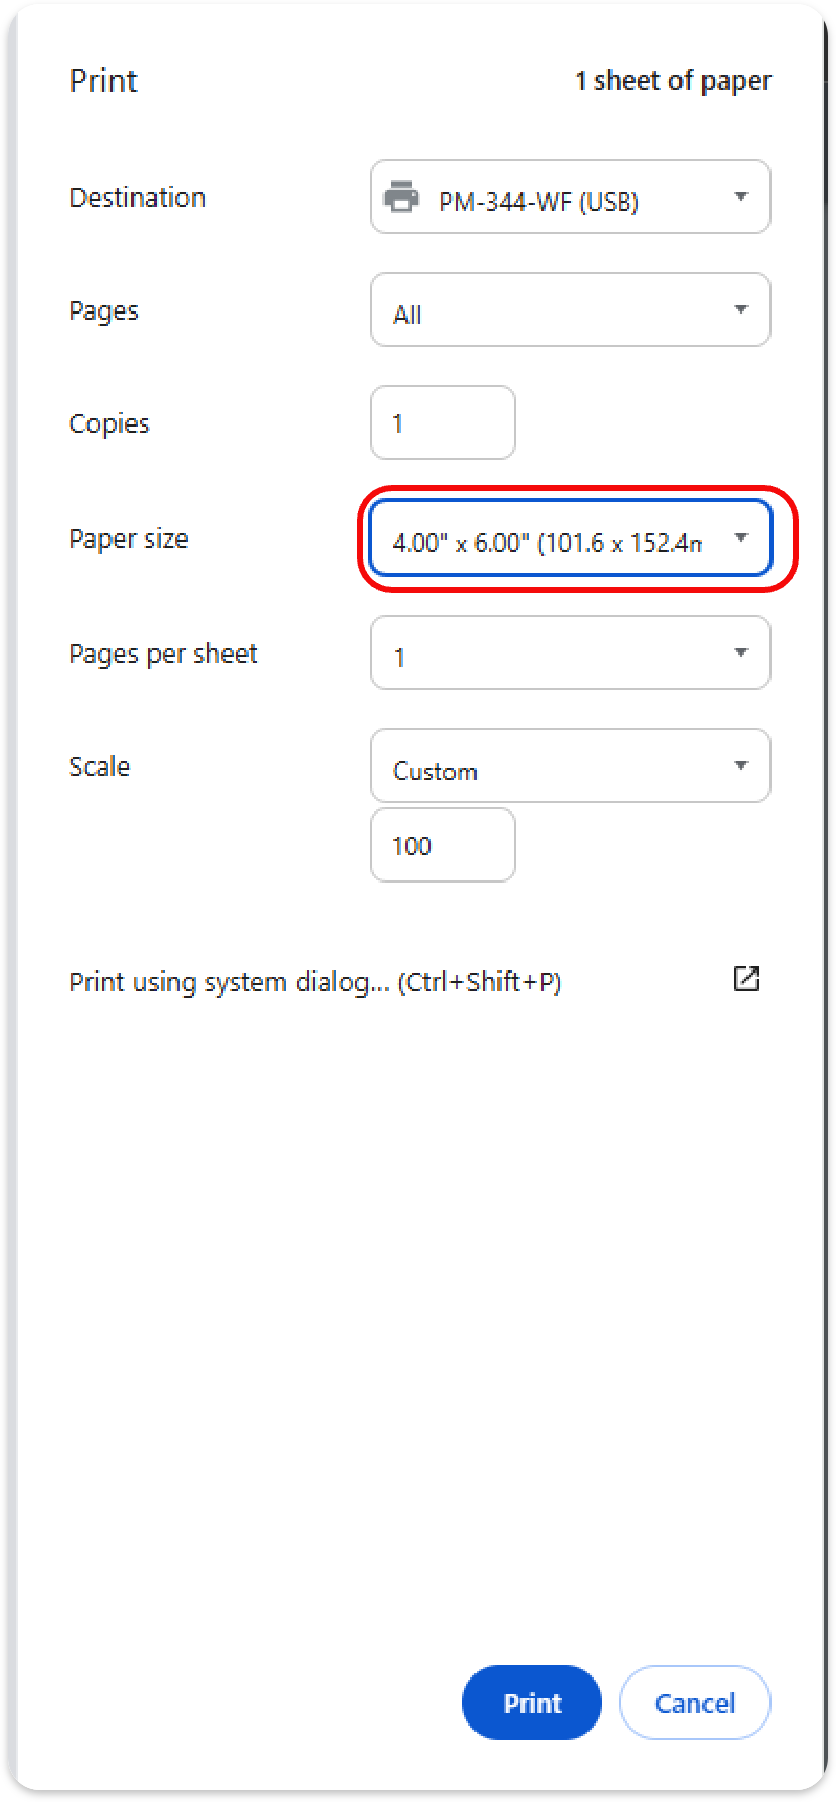
For more detailed instructions, you can refer to Shopify's official guide:
Please remember to select the print size that matches your actual printing paper.
For more detailed instructions, you can refer to Shopify's official guide:

Didn't find what you were looking for?

Contect Us:bestservice2012@outlook.com
Related Articles
Self-Service Troubleshooting Guide for Common Issues (Applicable to PM-241 Series and D520 Series Shipping Label Printers)
FAQ Applicable to the Following Models 1.General Usage FAQ Q1:How to Install Paper Correctly Q2:Bluetooth Connection to Labelife Q3:How to Use labelife(PC) Q4:How to Use Labelife APP(Mobile device) Q5:How to Use Shipping Label Printer Q6:Power on the ...【ShippingEasy】Guide to Print Shipping Labels
ShippingEasy is a powerful tool for managing your shipping process, from setting up a printer to generating pick lists and packing slips. Here’s a step-by-step guide to get you started: Before using ShipStation, please make sure the shipping label ...Guide to Printing Shipping Labels on ShipStation
Before using ShipStation, please make sure the shipping label printer has the driver installed and successfully printed a test page. Click the article below to complete this step: How to Use Shipping Label Printer 1. Set Up Your ShipStation Account ...How Amazon Sellers can Print ASIN and Shipping Labels
Printing accurate labels is essential for managing inventory and ensuring smooth shipping. This guide explains how to print both product SKU labels and shipping labels for FBA (Fulfillment by Amazon) and FBM (Fulfillment by Merchant). 1. Printing FBA ...【eBay】How to Use Shipping Label Printer to Print 4×6 Labels
Printing shipping labels correctly on eBay is essential for ensuring smooth order fulfillment and reducing delivery issues. This guide will walk you through the steps to set up and print your shipping labels using the shipping label printer. Step 1: ...